Toolbelt
Tool Slot
Tool slots can hold a variety of utility tools used throughout OrbusVR. You have two equippable slots accessible from the inventory menu, which function the same way as the armor and weapon slots. Similar to the other equippable slots, you can only place tools in the tool slots, though consumable items, such as potions or dragon treats, can be equipped as item stacks in a single slot for mutliple uses. Like other inventory slots, items equipped to your toolbelt cannot be changed while in combat or while dead. The tool belt also has your permanently attached compass which does not take a tool slot. Many of these tools have different cosmetic skins that can be obtained and used instead (see Cosmetic Tools).
Tools
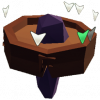
Compass: the compass is your only permanently attached tool on your toolbelt. It can be used to locate teammates (green arrows), places (white arrows), and your gravestone (blue arrow) when help upright. If flipped upside-down, it will bring up your journal. The compass does not have an associated equipment slot and always rests on your left side (or wherever you have relocated it to).
Teleporter: Teleports you to your player owned house after a brief period. To activate, grab it from your toolbelt and hold it in either hand for 5 seconds. After completing a teleport to your house, it has a 25 minute cooldown. It is sometime referred to as your “cookie” due to the standard model. Cosmetic variants are available from the Cosmetic Store and from Mayor Kaia.
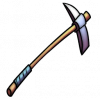
Harvester: The harvester is your primary resource collection tool. Equip and swing it through a harvestable resource to collect it. Each resource has a unique hitbox, so you may need to experiment to find where each detects your swing the best. Minerals take two swings to mine. Cosmetic variants are available from the Cosmetic Store and from Whisper.
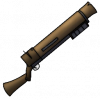
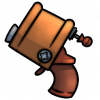
Net Gun: The net gun allows you to call and capture critters throughout the overworld. You can get the net gun from Pierre Cenn and use it for his critter capture missions. Equip the gun in a tool slot and look for various droppings, eggs, or markings. Raise the built-in horn to your face to flush out the critters, then pull the trigger to shoot a net at them. Gotta catch 'em all. Cosmetic variants are available from Pierre Cenn.
GrindingTool: The Grinding tool is an item designed to reward all your effort in slaying monsters. You can get the tool from the NPC next to the odds and ends shop. Once equipped, you will go out into the over world, throw out the device, and begin killing mobs. As you kill the correct mobs, glowing orbs will fly into the machine. The device will level up 5 times, giving you 5 rewards from the loot-table of the monsters you killed. Each level will require more effort, so will likely take you through the over world all the way to the Wastelands to get all the way to level 5. To level, you will need to kill progressively harder enemies, ending with level 32+ "red" enemies in the Wastelands, The DLC zones or the Forsaken Isle.
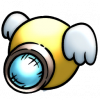
Selfie Bot: The Selfie Bot lets you take a photo of yourself and your surroundings. Throw it out, and a window opens in the air to show you what the camera sees. Cosmetic variants are available from the Cosmetic Store, from Trickster Tokens, and from Mayor Kaia. Selfies are saved in %AppData%\LocalLow\Orbus Online, LLC\OrbusVR\screenshots on PC and Quest\Internal shared storage\Android\data\com.orbusvr.OrbusVR\files\screenshots on Oculus Quest headsets.
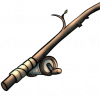
Fishing Rod: the fishing rod is used in conjunction with a lure in the second tool slot to obtain fish for crafting or trading. Fishing rods can be purchased from Chef Lethrow, who will also provide fishing quests. Lures must be crafted in the player owned house.
Tagger: The tagger is a tool a party leader can use to mark specific enemies inside dungeons or raids. It can be purchased from the Odds and Ends vendor in Highsteppe for 10 dram. It can either mark enemies with a red X or a green O over their head. To swap between marking types, or to set it to erase markings mode, pull the slide on the back end.
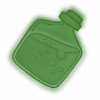
Potions: A variety of potions can be created using alchemy. To use potions you must first equip them on your toolbelt. At any point you can then grab them and turn them upside-down over or directly in front of you, as though you were pouring it out on yourself. A stack of the same potion can be equipped in one toolbelt slot.
Pet Treats: Pet treats of all varieties can also be equipped on and used from your toolbelt. To use a pet treat, grab it and toss it towards your pet dragon. If successful your dragon will react and a treat will be consumed, and if unsuccessful the treat will simply be returned to your toolbelt. You may have to toss the treat directly onto your dragon for it to successfully eat it. Pet treats are necessary for performing Dragon Races

