Difference between revisions of "Bestiary"
| Line 48: | Line 48: | ||
|} | |} | ||
| − | |||
| − | |||
| − | |||
| − | |||
| − | |||
| − | |||
| − | |||
| − | |||
| − | |||
| − | |||
| − | |||
| − | |||
| − | |||
| − | |||
| − | |||
| − | |||
| − | |||
| − | |||
| − | |||
| − | |||
| − | |||
| − | |||
| − | |||
| − | |||
| − | |||
| − | |||
| − | |||
| − | |||
| − | |||
| − | |||
| − | |||
| − | |||
| − | |||
| − | |||
| − | |||
| − | |||
== First Encountered In Lamavora Battlegrounds == | == First Encountered In Lamavora Battlegrounds == | ||
Revision as of 18:15, 4 June 2019
Contents
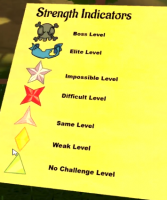
Level Indicators and Content Difficulty
Approximate strength (may be influenced by gear)
- Impossible: 2+ Levels above you
- Difficult: 1 Level above you
- Same Level: Equal level to you
- Weak Level: 1 Level below you
- No challenge: 2+ Levels below you
Elite level enemies will also have a colored approximate strength indicator with the elite tier banner. Boss tier enemies do not have an approximate strength indicator, just the boss tier symbol. Note that with OrbusVR Reborn came scaled content.
In the Overworld, most enemies are scaled +6/-4, meaning you can only really hurt enemies at most as if you were 6 levels higher and at least as if you were 4 levels lower. In effect, if you are a level 15 or level 20 fighting a level 24 monster, you will do the same percentage damage, even if the damage values show up differently (and you will take the same percentage damage as well). If you are level 26 or 30 fighting a level 20 or lower scaled monster, the same would be true. This formula is only impacted by the use of tiered weapons and armor (+1 or higher), which will provide an additional level advantage to your damage or damage reduction.
Unscaled monsters, enemies with brackets around their level indicator, act as they previously did, with no cap on the level difference.
Overall Loot Table
| Loot Item | Image | Highsteppe | Flooded Rainforest | Lamavora Battlegrounds | Hulthine's Basin | Wastelands | Dungeons | World Bosses |
|---|---|---|---|---|---|---|---|---|
| Small Tongue | X | |||||||
Overall Enemy Locations
| Enemy [Tier] |
Photo | Highsteppe | Flooded Rainforest | Lamavora Battlegrounds | Hulthine's Basin | Wastelands | Dungeons | World Bosses |
|---|---|---|---|---|---|---|---|---|
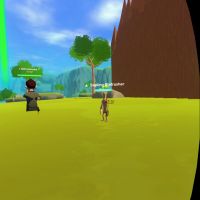
| Sapling Stafrusher |  |
X | ||||||
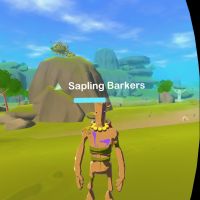
| Sapling Barkers |  |
X | ||||||
First Encountered In Lamavora Battlegrounds
| Name [Tier] |
Picture | Location (Region : Location) |
Drops | Notes / Mechanics |
|---|---|---|---|---|
First Encountered in Hulthine's Basin
| Name [Tier] |
Picture | Location (Region : Location) |
Drops | Notes / Mechanics |
|---|---|---|---|---|
First Encountered in the Wastelands
| Name [Tier] |
Picture | Location (Region : Location) |
Drops | Notes / Mechanics |
|---|---|---|---|---|
Dungeon Bosses
| Name [Tier] |
Picture | Location (Region : Location) |
Drops | Notes / Mechanics |
|---|---|---|---|---|
| Dungeon Troll [Boss] |
Crypt | Dungeon Shard | Danger Circles Radial Beam Damage Reduction | |
| Lich King [Boss] |
Crypt | Dungeon Shard | Small Danger Circles Bolt Radial Bolts Invulnerability Adds | |
| Mutated Rat [Boss] |
Sewers | Dungeon Shard | Enrage Poison Room | |
| Sewer Slime [Boss] |
Sewers | Dungeon Shard | Trailing Bolt Danger Circles Damage Reduction Adds Punch Attack | |
| Chaos Purity [Boss] |
Airship | Dungeon Shard | Tankbuster Poison Pools Falling Exploding Danger Pool Balls | |
| Chaos Hunter [Boss] |
Airship | Dungeon Shard | Shotgun Bolts Line Bolts Impending Doom Enrage | |
| Minotaur [Boss] |
Broken Halls | Dungeon Shard | Tankbuster Trailing Exploding Balls Enrage | |
| Gorgon [Boss] |
Broken Halls | Dungeon Shard | Trailing Bouncing Balls Petrifying Gaze Adds |
Raid Bosses
| Name [Tier] |
Picture | Location (Region : Location) |
Drops | Notes / Mechanics |
|---|---|---|---|---|
World Bosses
| Name [Tier] |
Picture | Location (Region : Location) |
Drops | Notes |
|---|---|---|---|---|
